Month: September 2018

A better Fillet example

First create a rectangle with the rectangle command. Make the first corner point 44,16 and press enter.

rectangle 1.PNG


Then the other corner point 12,18.

rectangle 2

You will end up with a rectangle that looks like this( go to the lower left corner to find it if you are zoomed way out) :

rectangle 3

Now we are going to fillet the rectangle to make it have rounded edges. Click the fillet command. Then type r (for radius).

fillet 1

Choose 2 as the radius.

fillet 2

Select p for polyline

fillet 3

Hover the cursor over the rectangle and it will show the preview. Click on the rectangle and it will fillet it.

fillet 4

fillet 5


Computers 9 10: Infographic

An Infographic lets you use images in place of words to express or show ideas or knowledge and relationships to present information quickly and clearly. This uses our innate visual ability to see patterns and trends.


You are going to make an infographic about yourself and one of your hobbies. You will need to give information in text and graphics about it. You will need to have something that you can give us at least 8 different bits of information about. Today you need to decide your topic and what those 8 things are going to be, then you need to design icons for them. Sometimes, there already will be an icon that fits, you can just draw your own version of it. Other times you will have to make an icon for it.

The better icons you draw, the better your mark.


Then think about what your infographic will be, and what icons you will need.

Drafting 11 12: 3 point Perspective Birds and Worms eye View

Hey now we will do our last two perspective drawings, from above and below. To get a perspective from above or bird’s eye view we need to add a third point that is below the horizon line, in the middle of the two vanishing points that are on the horizon line.

Like this: maxresdefault

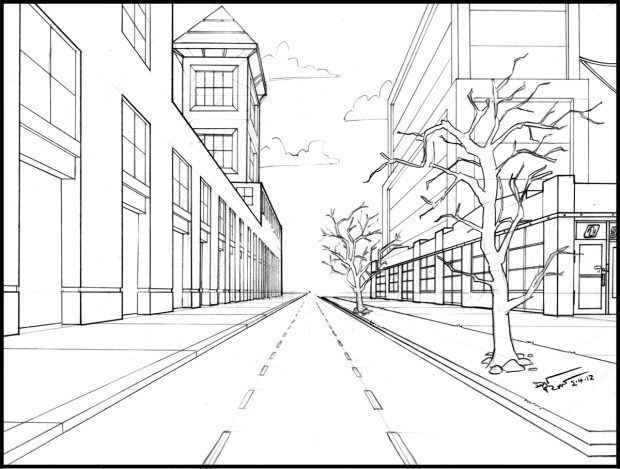
As you can see in the drawing, it looks sort of like our city view in 2 pt perspective but there is a difference. All of the vertical lines (going up and down) in the drawing start from the third point in the middle of the drawing. The horizontal (going left or right) lines on the right or left all connect to the vanishing points on the right or left.

This tutorial will show you how to start drawing  a bird’s eye view.

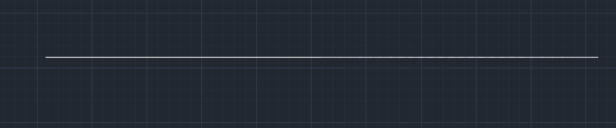
First draw out the horizon line and add two small circles on each end for the horizontal vanishing points. .

horizonline with 2 circles at ends

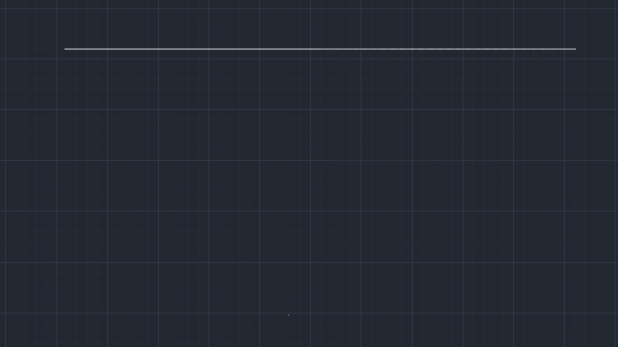
Add a third vanishing point below the horizon line. Leave enough room for your buildings.

step 2

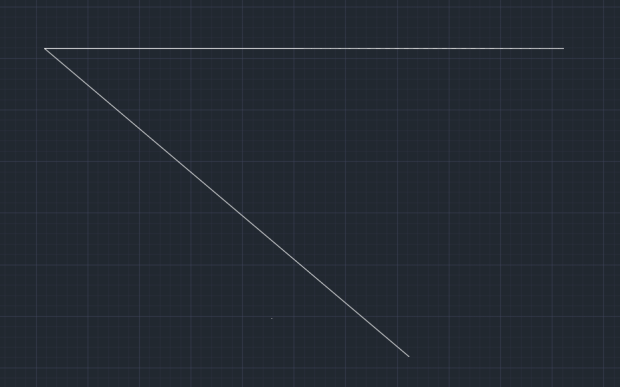
Draw a line from one of the vanishing points heading down.

step 3

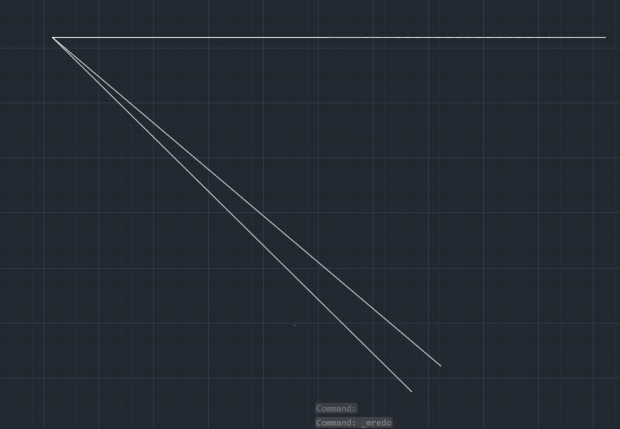
Draw another line like the one you just drew.

step 4

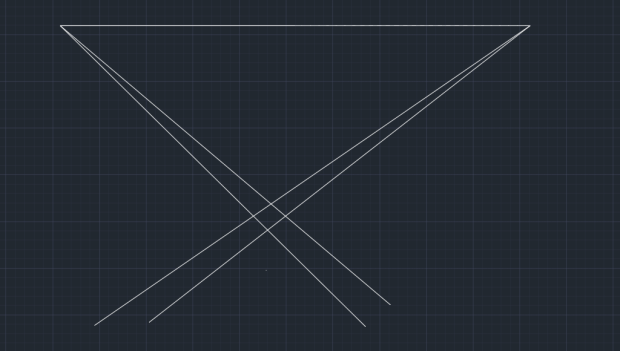
Now draw a line from the other side that crosses the other lines.

step 5

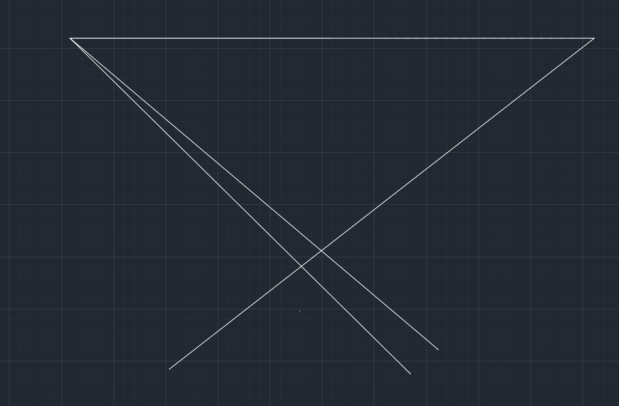
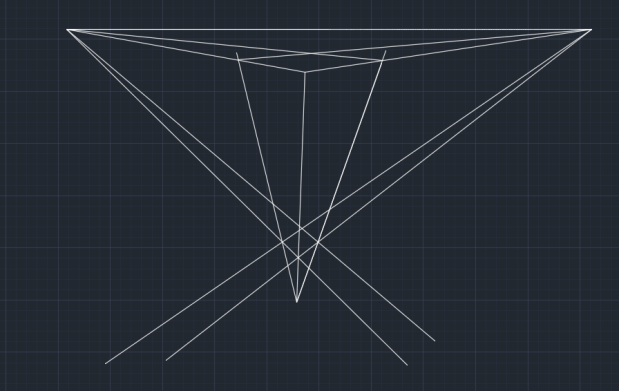
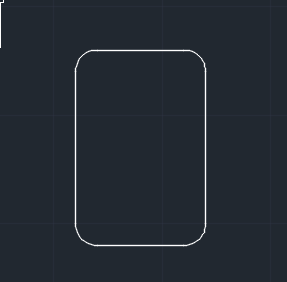
Draw another crossing line, you should end up with a rectangle.

step 6

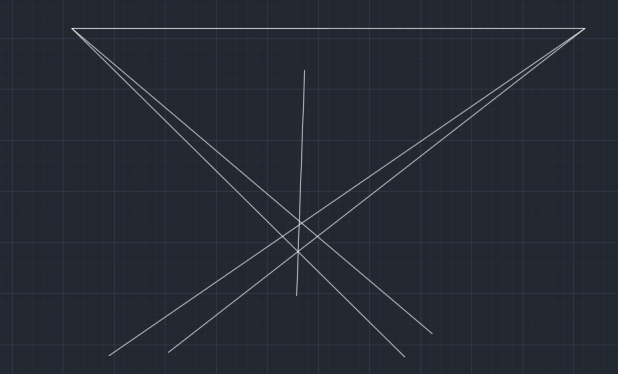
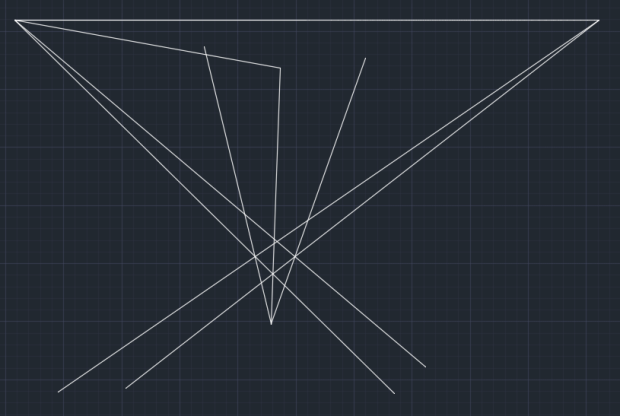
Draw a vertical line from your vertical vanishing point that crosses through where the lowest point of the rectangle is. Be careful to go right through that corner.

step 7

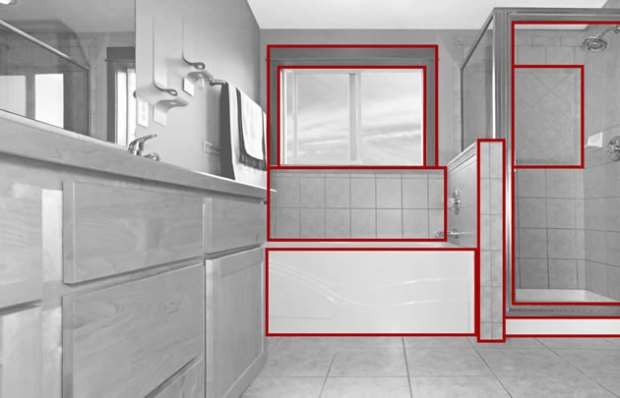
Draw another line from the vertical vanishing point that goes through another corner of that rectangle (highlighted in example).

step 8

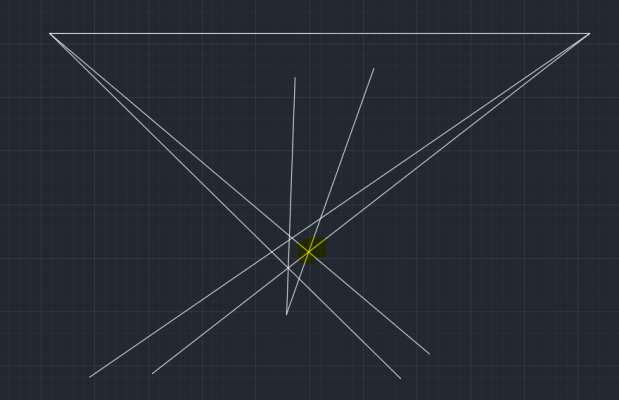
Do the same thing on the other side. step 9

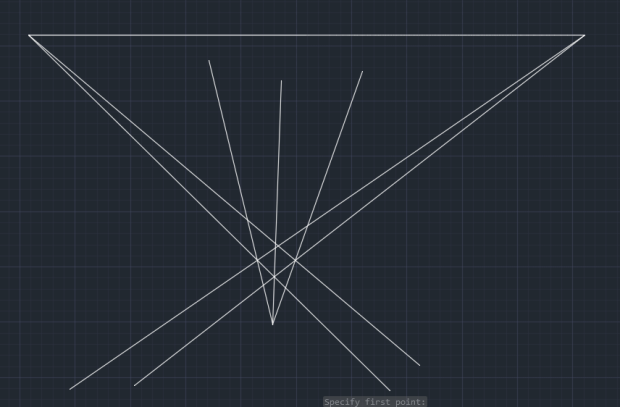
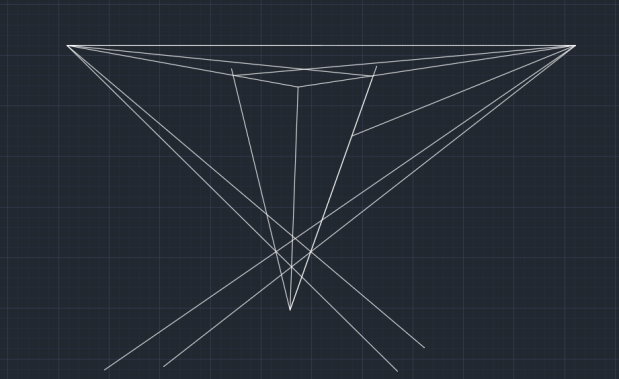
Draw a line from one of the horizontal vanishing points that crosses the outside vertical line and ends at the central vertical line.

step 10

Draw a line from the other horizontal vanishing point that crosses the other outside vertical line and ends at the central vertical line.

step 11

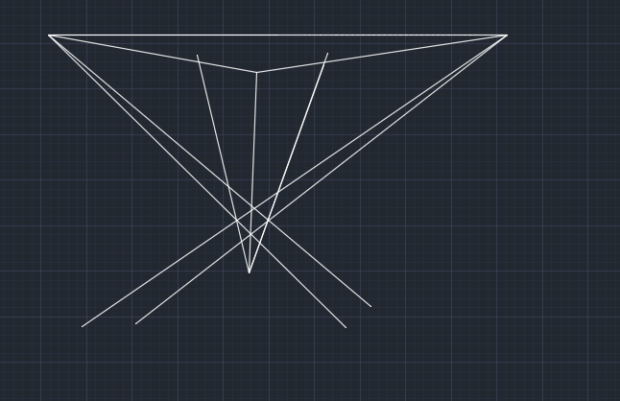
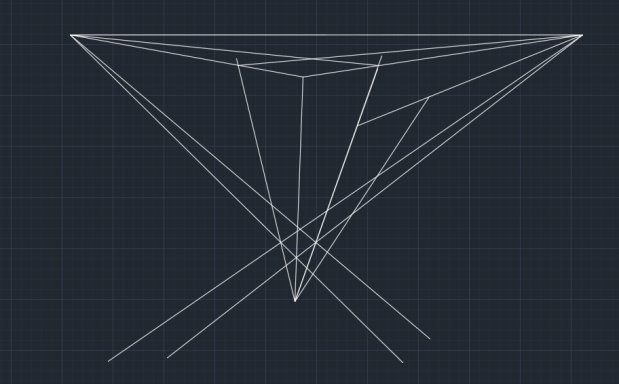
Draw a line from the outside corner (top of the building) that stops at the vertical point on the other side.

step 12

Do the same thing going the other way. Now the roof of your building is visible.

step 13

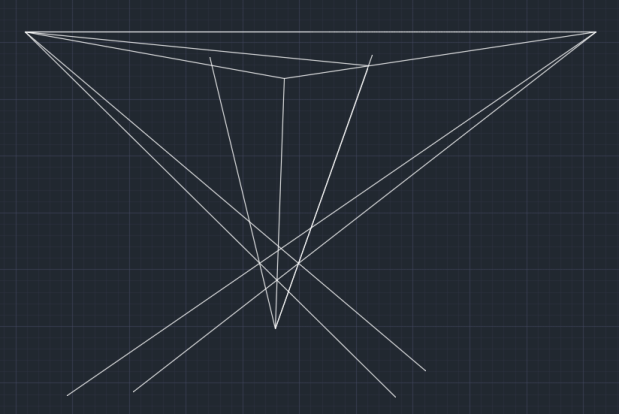
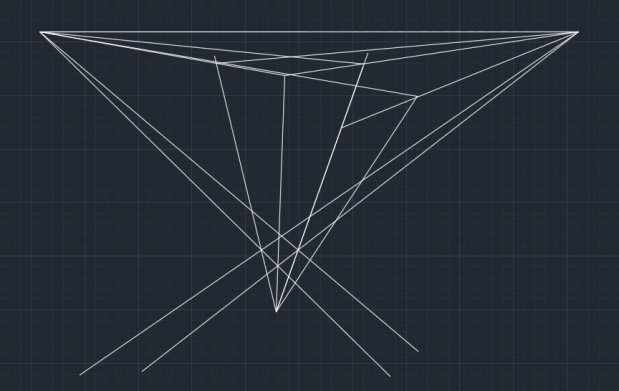
To make the next building draw a line from one of the horizontal line that stops at the outside vertical line of the building.

step 14

Draw a vertical line from the vertical vanishing point that crosses your new line.

step 15

Draw a line from the point your newest lines meet to the other side. Now you have two buildings (without details).

step 16


This is based on the  tutorial  here:

Just make the building taller, like a skyscraper, not short, like a house in the tutorial.

You can also keep the roof flat if you want.  Then just run more lines up from the center vanishing point to add more buildings. Make sure you have at least 2 windows, 4 buildings, a plant, and 5 other things in your drawing.

OLYMPUS DIGITAL CAMERA

You will have to also have to draw a worms eye view. Here are some pictures taken from another tutorial that shows the steps to do it really well but they color the buildings in, and you don’t have to do that. Take a look at the pictures and see how to do it, step by step.

Make sure you have at least 2 windows, 4 buildings, a sidewalk, and 5 other things in this  drawing.

I will put a link to the site at the end of the pictures, but they are using a different program to draw the perspective, so the tutorial talks about some stuff that we don’t have in autocad.

this is where all the steps come from.

More Examples


Drafting 11 12: 2 point perspective!

Howdy!

We are going to learn about 2 point perspective, which is just like 1 pt perspective, except now we have 2 vanishing points to help us line stuff up.

The first thing to do is follow this tutorial and draw a house.

Add 2 things to the house when you are done the tutorial. Then you can hand it in as a file called yourname 2 pt house.

The next thing to do is make a cityblock in 2 point perspective, see here.

Have a bunch of buildings, and make them look different, but all lined up.

Call that  2 pt cityblock yourname.

Drafting 11 12: One Point Perspective

1_1_resch_line-drawing

In one point perspective the view is face on with things getting smaller the further away they get.

Objects surfaces viewed face on retain their true shape, using mostly horizontal and vertical lines.

1-true

“Surfaces that travel away from the viewer, on the other hand, converge towards a single ‘vanishing point‘. This is a point that is located directly in front of the viewer’s eyes, on a ‘horizon line’ (also known as an ‘eye level line’), as illustrated in the photo below:

I got this excellent info, pictures, and description from  this site Click it for more detail.

You are going to use autocad to practice drawing in one point perspective.

Please do the exercises One point perspective cubes and then 1 point perspective: Complex forms. You  only need to hand it in when it looks like complex forms. Write the first letter of your name in the complex forms where the A is.

Computers 19 INFOGRAPHIC ICON info

Hi, do you know what this is?


floppy-8

It could store 720 kb of memory. It’s an 8 inch floppy disk.

storage-8inch-floppy

That’s how big it was, and it couldn’t even store more than half of an mp3.

It got replaced by the 5 and a quarter inch disk.

5-and-8

Those 5 and 1/4 inch disks got replaced by this:


dysan_floppy_disk_01

That puppy is less than half the size (3.5 inches) and could store twice as much 1.44 mb which is about the size of a regular quality mp3 for a song.

Why am I talking about this ancient technology?

floppy-family

Because you sort of knew what this thing was all along. You see it every time you push the save button for almost anything, because it is the save icon.

A good  Icon is a picture that represents something really well. You know what it does, because you know what it represents.

Like this:

doom-health-pack

That’s a health pack from the video game DOOM, the original one. Now all health packs or first aid kits in video games look like that, because the design comes from the red cross organizations icon.


I.E. You know the icon for happiness right?

happy-face-clip-art-smiley-face-clipart-3-clipartcow

What is an emotion that doesn’t have an icon? What about when you are feeling tired and happy? What would that look like?

As the first part of this assignment, think about what a good symbol for being tired and happy would look like and create 3 versions of it. Don’t look for a symbol on the internet, actually start from scratch.


Drafting 11/12 first assignment

Hey there!

We are going to start off with Autocad, and I am going to guess that some of you have not used it before. I might be totally wrong, in which case, you all get an easy first couple of assignments. Yay!

Log in to your accounts, the user name is usually firstname.lastname or firstinitial.lastname, but some people are exceptions to these rules. See the teacher if you don’t know your username. The teacher knows that password that all of your passwords have been reset to. They will tell you what it is.


Step 1: Open the start menu, go to programs, autocad 2017- English and choose it.

start up autocad

Then Autocad will start up, and give you a screen that looks like this: Click on start drawing.

start drwaing pic 2

Look up in the left corner and you will see this:

first tool bat

Click on line and then click on an empty part of the grid to start drawing a line. Draw a octagon (like a stop sign). Push the ESC key in the top left part of the keyboard to stop drawing.

click on line

Then click on the line tool again and draw a triangle. Again, push ESC to stop drawing.

Then click the circle tool. Choose center, radius. Then draw out a few circles.

circle tool

Now let’s practice saving. Click on the big red A in the top left corner and choose Save. Call this file AC1yourname.

file stuff

Take a look here:

first tool bat

To the right of the circle tool is the rectangle tool. Use it to make a rectangle.

To the right of the rectangle tool is the move tool. You can click on something you drew to select it, then click move to reposition it. It will ask you to select a base point, click somewhere on your shape. Then it will let you move the shape somewhere.

selected

This lets you know the shape is selected.

Thenmove part two

Then just move the shape somewhere else on the grid and click.

move3

Move the shapes you have made so that the Octagon and the circles are linked. Make a small rectangle move in to the triangle.

Save the file again.

This time click on the big red A and choose new, then drawing.

new drawing

For this drawing use your newly acquired (or refreshed) shape drawing and moving skills to make a nice looking (flat) house drawing. Include at least 4 windows or two different designs, a couple of doors, a car, some people, trees, plants, wild animals, pets, a fountain, a walk way, a garden, some weather, and any 5 other things that you can think of that fit the assignment and are school appropriate. When the class time is almost over, save your work as AC2yourname.


Computers 8: Intro to PS Tools, the brush and tool sign up sheet.

Hi Class,

We are going to learn how to use one photoshop tool, the brush. Then you will draw something you did this summer. The drawing should be as nice as you can do it, points for creativity, and beauty/coolness.

Log on to your computer with the your user name and password. All the passwords are reset to something the teacher knows. Ask them.

Your user name is yourfirstname.lastname usually. For example: Mandeep Singh would have the user name mandeep.singh    There are a few exceptions, sometimes it’s first intial.lastname So Manpreet Singh would be m.singh.  If both of these don’t work, see the teacher.

After you are logged in,

Step 1: Click on the start button and then Programs, Adobe  Photoshop CC 2018.

starting phoso

Photoshop will load up and then you will click File >New>Web

photo file

photo new file

Next click the brush tool (1), and change the color (2) and the size (3) to something that you like.

brush tool

Then just bring the cursor (brush) to the big white area and start drawing. Draw a picture about your summer. It should be as detailed and interesting as you can make it. Make sure that you have lots of color as well.

Save your work often by clicking on file, and then choosing save.

photo file save

The first time you save, you should name your file yournameps1 so you can find it easily next time.

Once you have been working on your summer brush projects for 30 minutes or so, it will be time to sign up for a tool with a partner and learn how to use it.  First save your file as above.

You can’t take the brush tool, obviously, but the other tools are good too. You can find out how to use it by using the help button inside of photoshop (it’s to the right of  view on the top of the screen), watching tutorial videos on youtube, or just fooling around with the tool to see what it does.

The teacher has a copy of the sign up sheet.


Grade 8 Rotation: course outline.

HorseOutlinePT33_13J There you go. One horse outline….


Whoops! My mistake, you need a course outline!

Class rules: no gum or food, water in containers is ok. Respect the equipment, the class, and the people in it, don’t be late, if you miss class you have to catch up on your own.

Topics: We will cover 2d animation, photo manipulations, and some game design and programming.