For this assignment, you are going to create a piggy bank. It could be made with the 3d tools rotate, and extrude, or you can make five views of it with the brush and shape tools. The five views are front, side, back, bottom and top. Remember that extrude will just make “walls” from your lines drawn unless you fill the closed shape before you extrude it. Sometimes that’s what you want. Make sure your piggy bank has four legs, a barrel like body, a head with a snout that sticks out, a slot for putting money in, and a plug on the bottom side so you can retrieve your cash without smashing the bank!
Month: September 2023
DTP MD: Rotate to make the plate!
Draw curves and lines, or use the arc tool to make profiles. Use the 3d tool rotate to make pots, bowls, hats and other shapes for practice. Then make 25 different rotated things and organize them in to a scene like a store, a room, or something else! You can use the shape tools, the brush tool, and the text tool to create the background for your 3d shapes.
DTP MD Make a cute monster mascot
When you are designing a character model that might become a 3d object like a toy or stuffie, you have to show all the major angles. That means a front, top, side and back view.
You have been asked by a town that is famous for a monster to make a mascot version of the monster. You must make it look cute, and draw out all four views of the creature.
Choose a famous monster and draw it out looking cute. You should be finished two views a class. Make sure your drawings are detailed, interesting and easily recognizable as the monster.
DTP MD : What is cute?
What makes things cute and cuddly? Why does Neoteny work across species?
Find 7 things that make something cute and 2 image examples of each one. Put in it in an illustrator document with a label for each of the 7 things.
DTP M.D. A Meshy situation
Use the Mesh tool, the flare tool, and layers to create a space scene that includes a Star (like the sun) a planet with landforms like oceans, deserts or mountains, a moon and a comet with a tail. Include a space background and some little stars off in the distance. Remember you can’t blend a mesh. You can also add a distant nebula or some other thing you can see in space.
DTP/MD: Will it blend?
Use the blend tool to link different shapes together to make cool new 3d shapes. Fill your page, be creative! Have at least 5 shapes when you are done. One bonus point will be awarded if you reckon out how to blend letters.
DTP/MD 9 10: Ovals
Use the oval tool, the selection tool, and the direct selection tool to make a cool picture that is made from ovals or things that started out as ovals before you warped them.
Minecraft Model of a Cartoon or video game character
Like it says on the tin, make a model of a video game character (not from minecraft) or a cartoon character inside a Minecraft creative world. They should be at least 30 blocks high. Include stuff from their game or cartoon in the background.
My favorite person
Draw a picture of your favorite famous person with the brush tool. Don’t trace a picture, just look at one as a reference. Include the thing that they are famous for in the picture.
DTP 9-10 Brushing up on our Calligraphy
Hey there fellow humans,
Today we are going to learn how to create a calligraphy brush in Illustrator, and then we are going to start on making an illustrated manuscript (I will tell you what that is later).
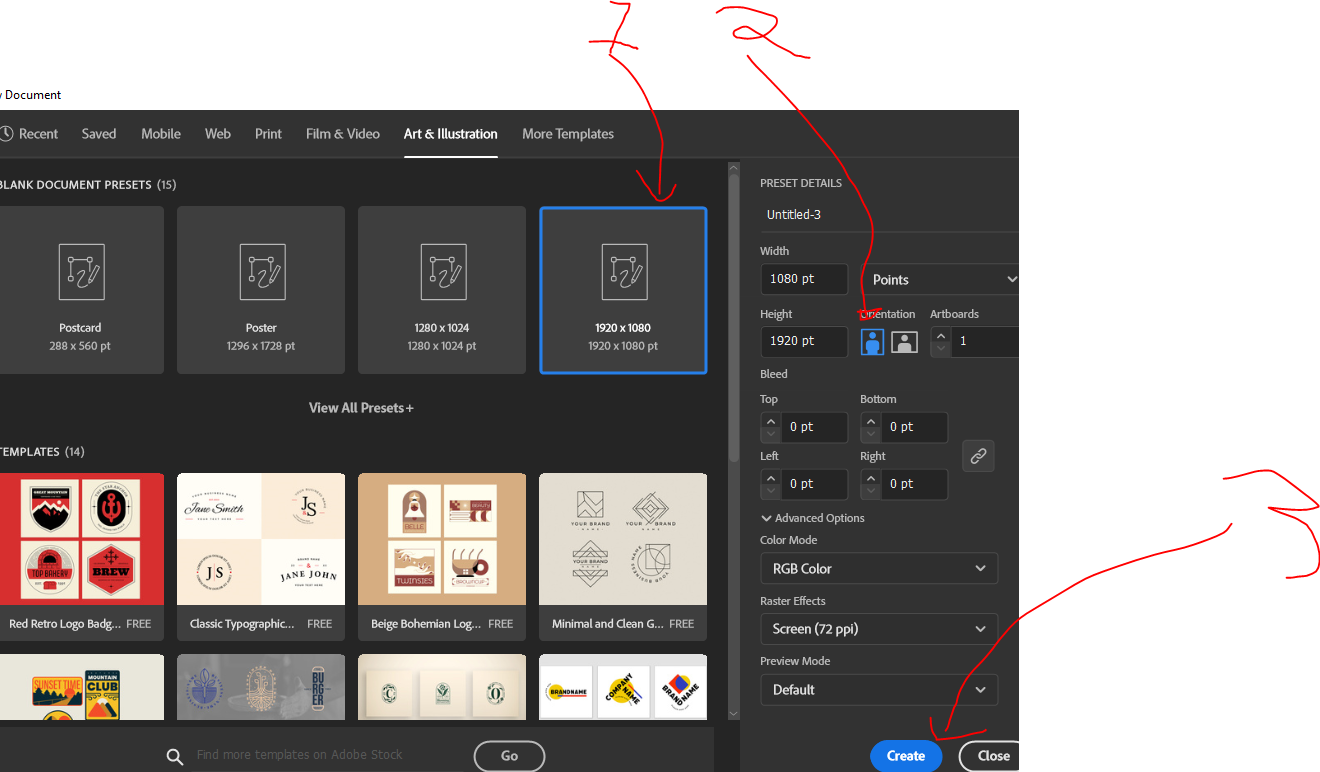
To make a calligraphy brush, first we create a new document that’s 1080 by 1920 and oriented vertically.
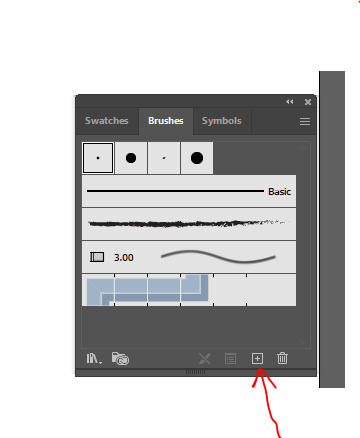
Now push the F5 key at the top of the keyboard, above the numbers 5 and 6.
This will open the brushes window. Press the plus symbol to create a new brush.
Choose Calligraphic (or leave it at that if it’s already selected).
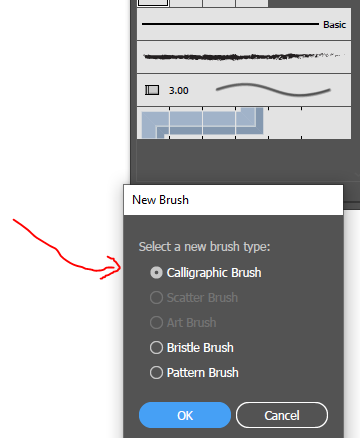
click Ok.
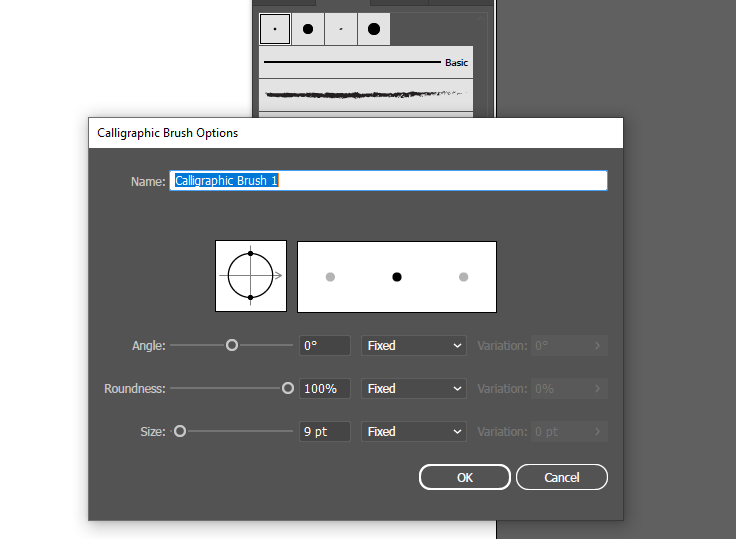
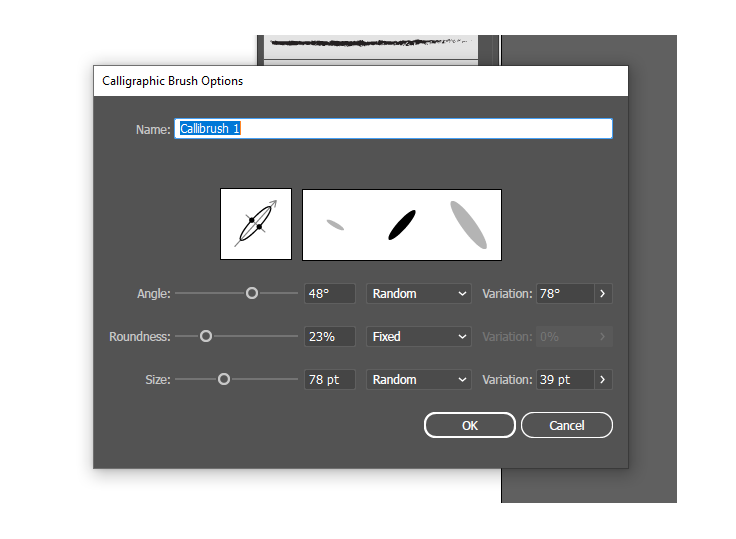
You will see the above picture first, change the options to make it like the bottom picture.
Name it something you can remember, I chose callibrush 1.
Click ok, and try out your brush on the document. Make some sweeps, turns and curls.
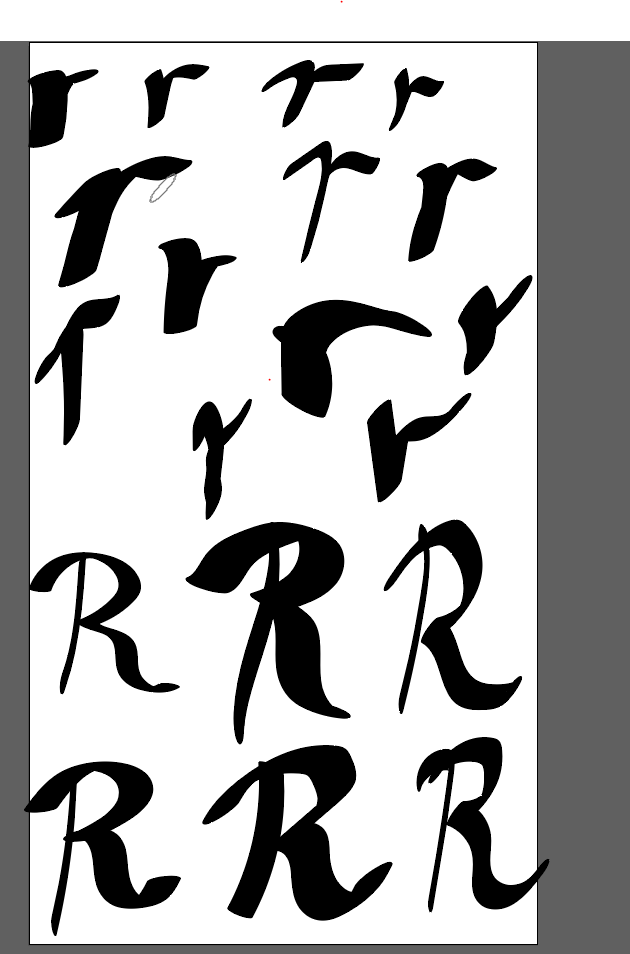
Look at a calligraphy guide and draw out the first letter of you name in lower case and capitals.
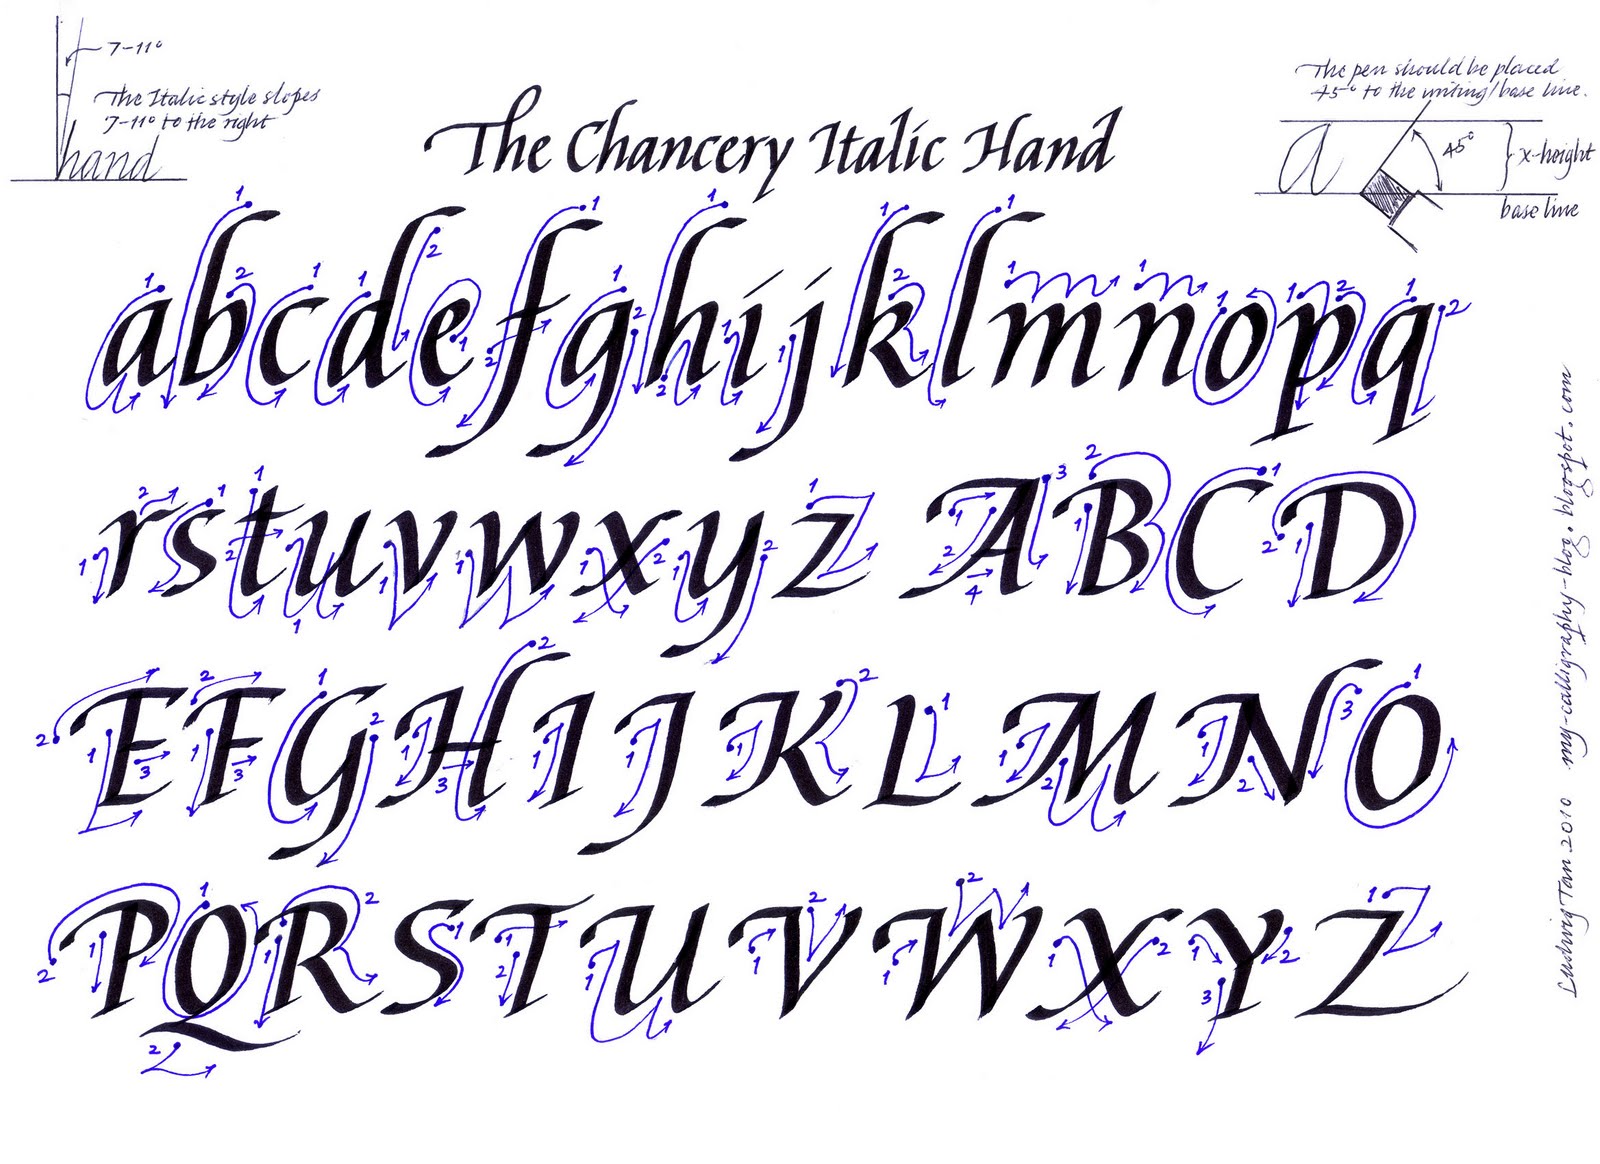
Here is a guide called the Chancery Italic hand.
This is the result of three or four tries for me, I just started over until it looked pretty good.
The random attributes means that no two strokes will look exactly alike, as if the ink was flowing out at different rates from our pen. It’s okay to select and delete letters that didn’t turn out well, then retry in the space you made. Save this and hand it in as letter practice.
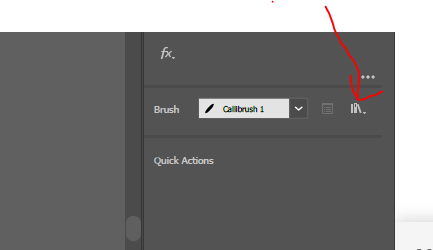
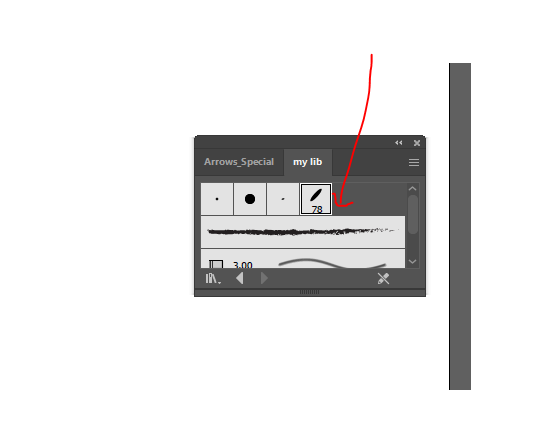
Let’s save the brush so we can use it on a new document.
First click on the brush area in the spot shown (libraries)
Now click save brushes
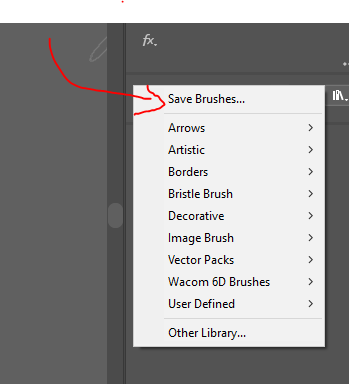
Then name it something you can remember, and save it.
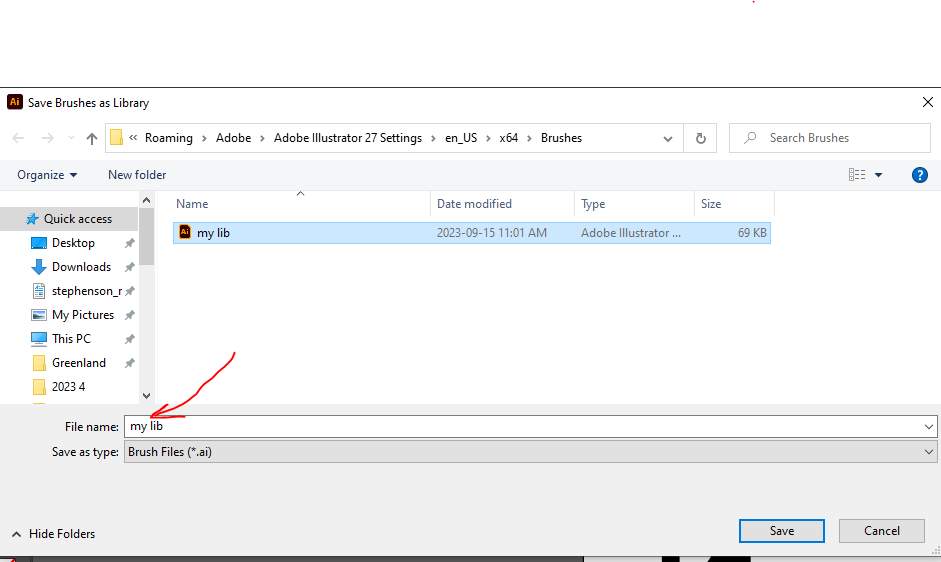
Great! That brush is saved.
Open a new document that looks the same as the last one, then get your brush.
Click the brush library, then choose User Defined.
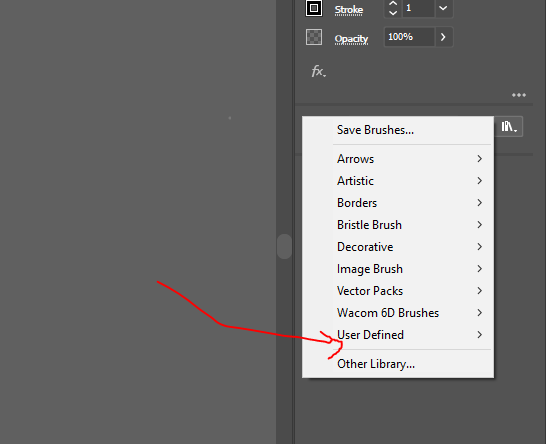
Select your brush file.
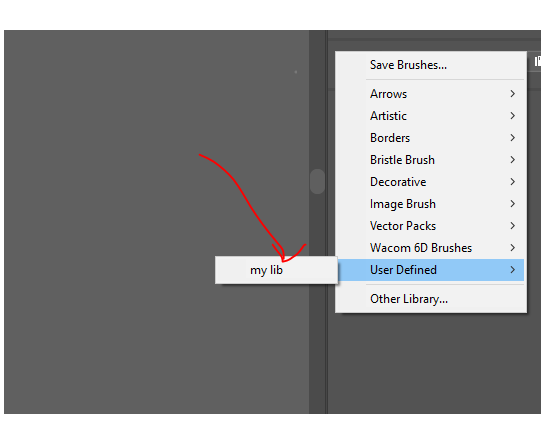
Then move the cursor around until you find your brush, then choose it.
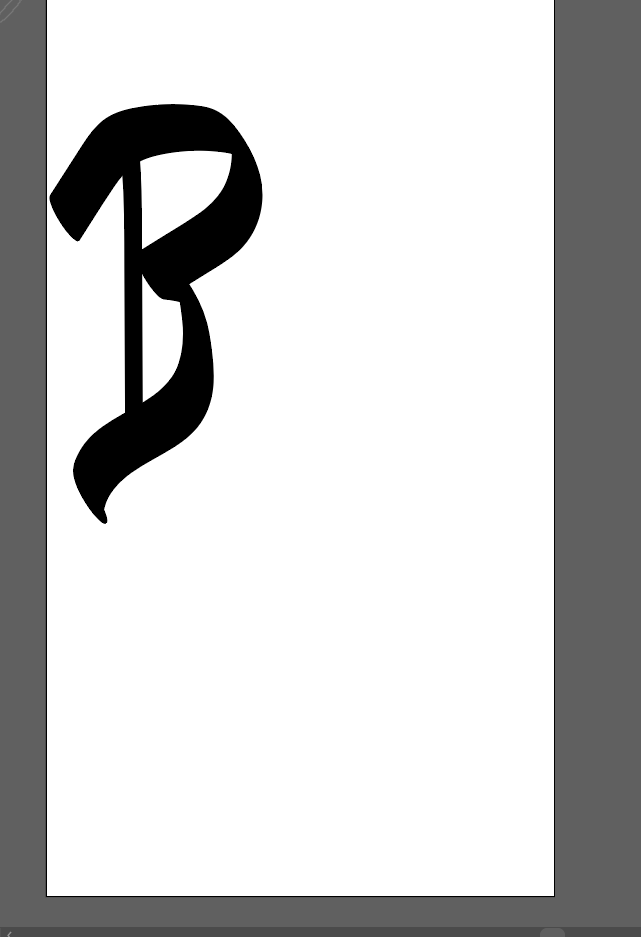
Next, we are going to make one big beautiful calligraphy capital letter that starts at the top left part of the page and stops near half the page down, and then add in place holder text.
You can draw whatever capital letter you think looks cool, just make sure it looks fancy and has space around it.
Here is a fancy B I chose and drew, it took me 5 tries before I was happy with it.
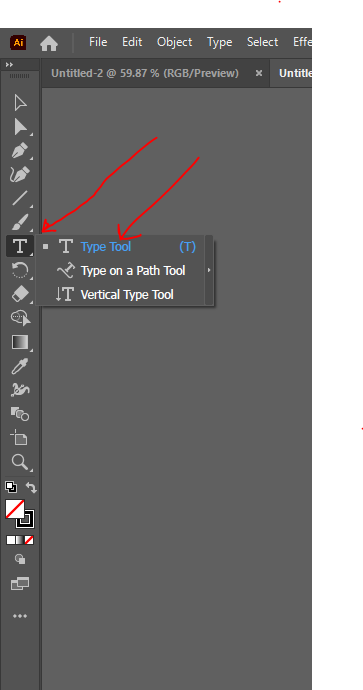
Now we are going to use the type tool to bring in a bunch of placeholder text.
Placeholder text looks like words, but it’s just a mixed up bunch of Latin words. It’s used by designers to layout a page before they have the words that are actually going to be put in place. It’s literally holding a place for the real text to go, therefore placeholder text.
Click the type tool and select it.
Next draw out a box beside your big letter. Text will fill the box.
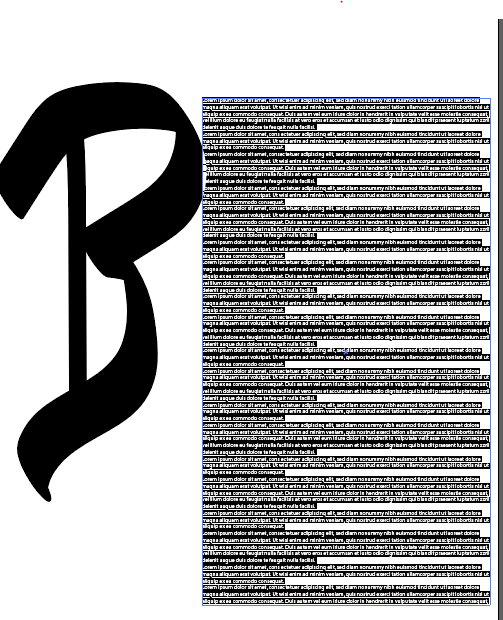
Adjust the font size until the placeholder text looks nice and realistic, with most lines going all the way across the page.

Ok, we are almost done the top half of the page. The last thing to do for the top part of the page is add cute and interesting illustrations in and around the letter and in blank areas at the edges.
That is why this document is called an illustrated manuscript. You have to draw at least 7 illustrations and place them around the top half of the page. Nature in the form of flowers, leaves and animals is a common theme.
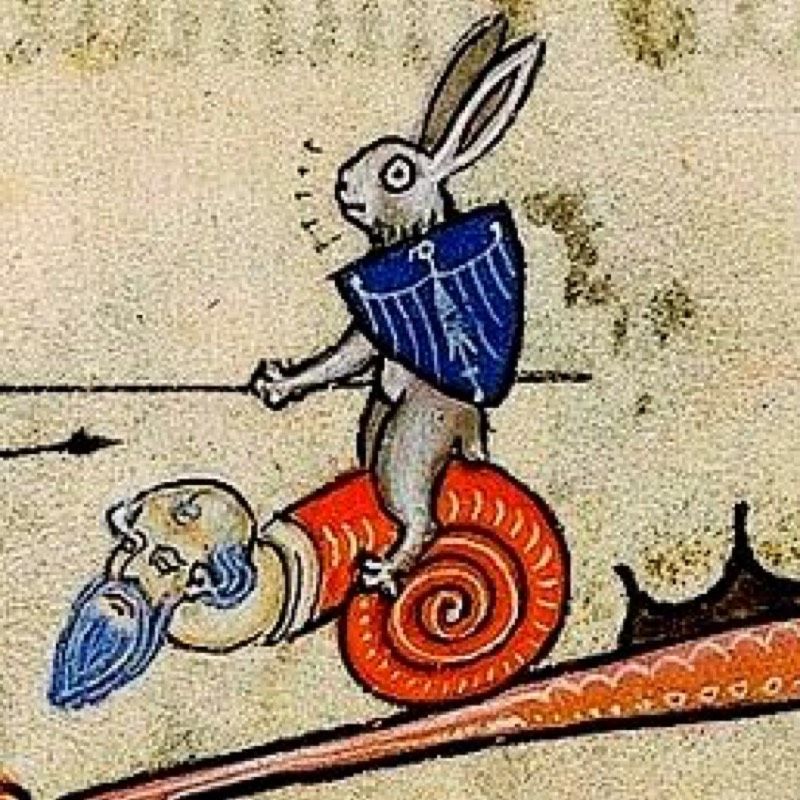
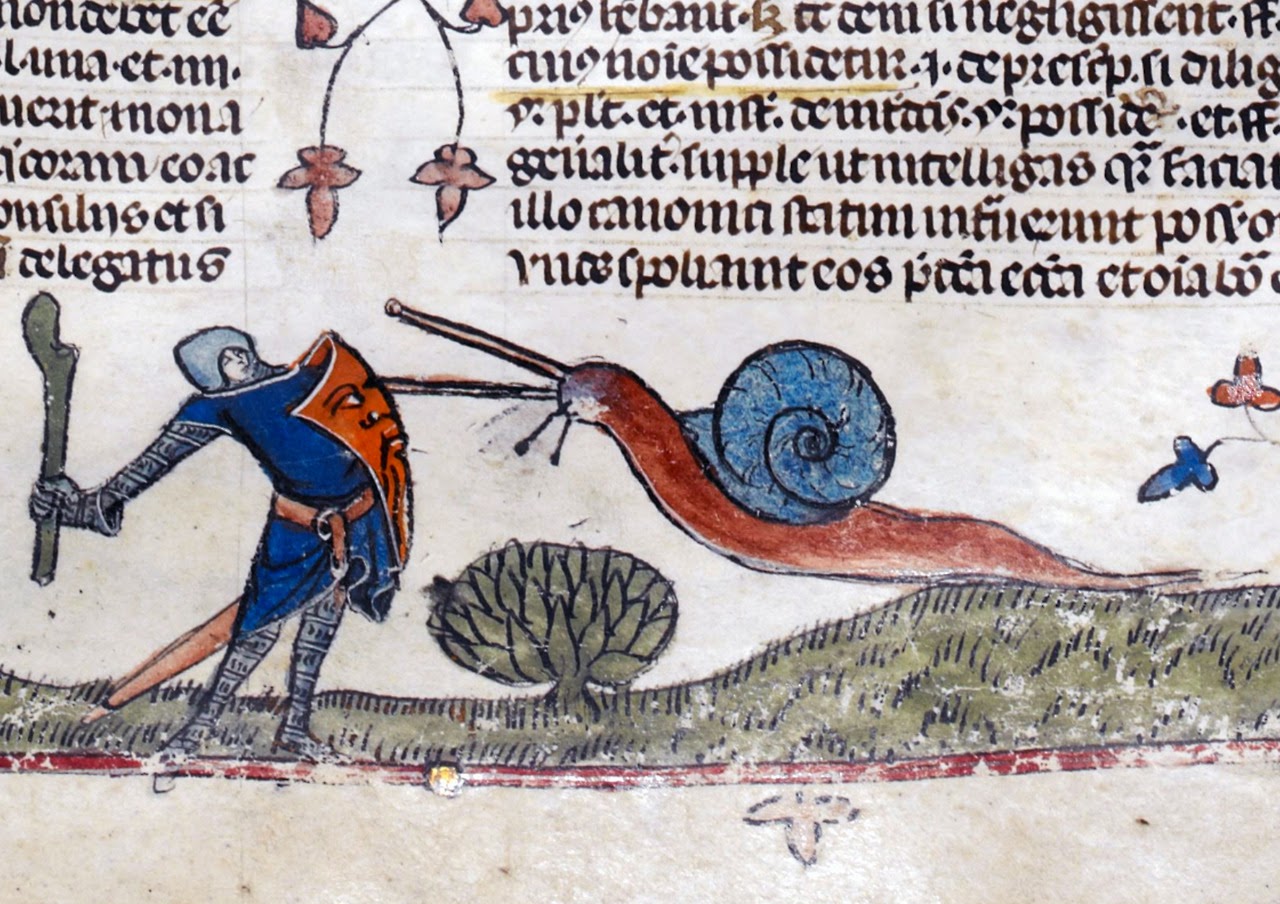
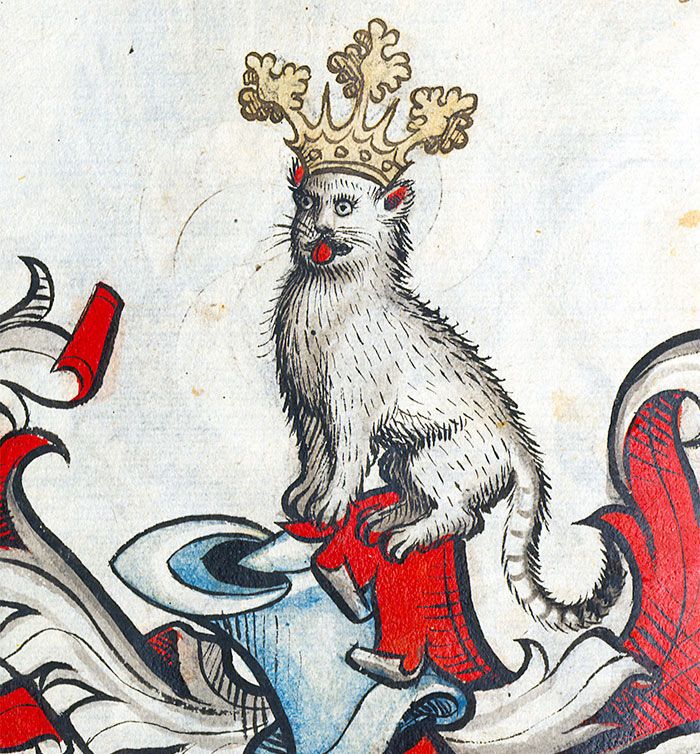
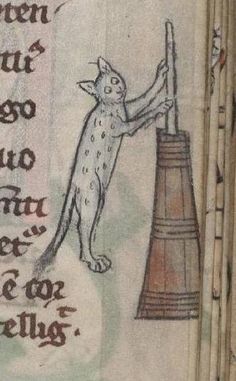
Scribes (people who copied out books before the invention of the printing press) used to draw in things that they were interested in, often snails, rabbits, or cats. These animals often had human jobs and were as big as humans. You can draw whatever you like, but it has to look nice, and you can’t trace it. You can use any shape tools you want, as well as the brush tool. You can copy and paste parts of your own art, for example if you want a cat on a horse and a cat fighting with a sword, you are allowed to draw one cat and copy and paste it for the other cat. You have to change up the color and appearance of the copy though.
Here are some examples of illustrations and pages:


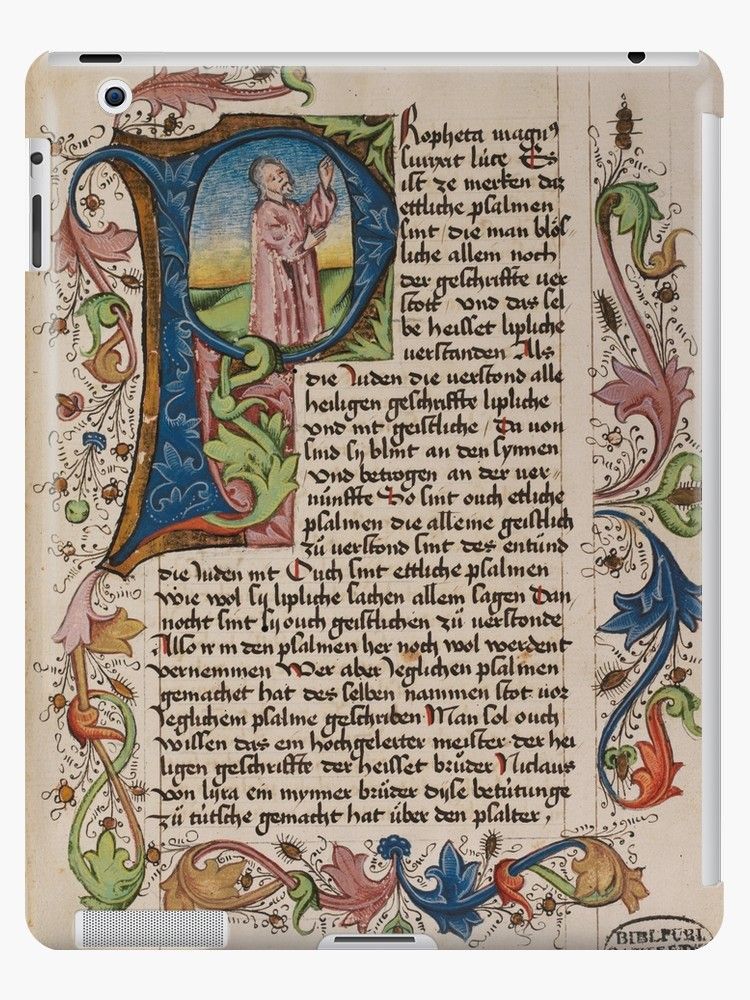
*No, folks back then didn’t have tablets, this last example is a tablet cover that uses an illustrated manuscript page for it’s art.

You must be logged in to post a comment.