Month: May 2017

Computers 19: Hardware Project

Hardware presentation  project

Work on this silently while others are filming.


1st thing: Do not copy and paste stuff from the internet. Follow the steps of paraphrasing you have learned previously.

  • Read the original until you understand it.
  • Rewrite the information in your own words.
  • Check your words against the original to see if the information is right.

What the powerpoint or prezi  has to have:

A hand drawn picture of the hardware (drawn by you or your partner) that is labelled and colored, take a picture of it and add it to the presentation, then hand this in to Mr. S.

A young person friendly explanation of how the hardware works.

What popular versions of the hardware exist ( at least 3)

The three biggest companies that make the hardware

What the hardware does in the computer

Three prices for the hardware: best price/performance (i.e. for videocards http://www.tomshardware.com/reviews/gpu-hierarchy,4388.html )

Cheap but ok,  and dream system.

A diagram of where the part fits in a computer and what the connector looks like.

Sources on the last slide of the presentation

Computers 19: Write a script

Todays assignment is to write a script with a partner or partners (groups of 2 or 3).  It should be a public service announcement about computers or some future tech. If you have a group of 2 you need at least 2 characters, if you have a group of three , you need at least 3 characters. The characters must be talking and doing something related to the public service announcement. There must be three different places that they are talking(i.e. a bedroom, a battlefield, the surface of the moon). The video should be about one minute long, (one page double spaced Calibri size 12, approximately 250 words.)

lol cat edit face

When your script is finished you will film it with toys or puppets in front of one of our mini poster sized green screens. When people are filming, the rest of the class has to be silent, so please bring headphones to class tomorrow and Friday.

We have a very short turn around time for this because we only have access to the film lab for the first three days of next week.

Bring your puppets, toys and if you have them green gloves with you to school tomorrow.

Cat_crying_(Lolcat)


Drafting 8: Orthographic projection
Finish up your birds eye and worms eye cities, then start orthographic projection.

draw the shape below in autocad, call it Toolbox.

u2s3l2f-26

Read the pdf below called projections and views,

projections and views

then complete these exercises by saving the files and opening them in paint. Write the correct letter for each view.

Choose 2 shapes from exercise 4 (above) and draw their othographic views in autocad. Label the views and the shapes you choose to draw.

3 point Perspective Birds and Worms eye View

Hey now we will do our last two perspective drawings, from above and below. To get a perspective from above or bird’s eye view we need to add a third point that is below the horizon line, in the middle of the two vanishing points that are on the horizon line.

Like this: maxresdefault

As you can see in the drawing, it looks sort of like our city view in 2 pt perspective but there is a difference. All of the vertical lines (going up and down) in the drawing start from the third point in the middle of the drawing. The horizontal (going left or right) lines on the right or left all connect to the vanishing points on the right or left.

This tutorial will show you how to start drawing  a bird’s eye view


Check the tutorial here:

Just make the building taller, like a skyscraper, not short, like a house in the tutorial.

You can also keep the roof flat if you want.  Then just run more lines up from the center vanishing point to add more buildings. Make sure you have at least 2 windows, 4 buildings, a sidewalk, and 5 other things in your drawing.

OLYMPUS DIGITAL CAMERA

You will have to also have to draw a worms eye view. Here are some pictures taken from another tutorial that shows the steps to do it really well but they color the buildings in, and you don’t have to do that. Take a look at the pictures and see how to do it, step by step.

Make sure you have at least 2 windows, 4 buildings, a sidewalk, and 5 other things in this  drawing.

I will put a link to the site at the end of the pictures, but they are using a different program to draw the perspective, so the tutorial talks about some stuff that we don’t have in autocad.

this is where all the steps come from.

More Examples


Computers 19: Design that game!

Hi Gals and Guys,

You will make a multilevel game with a partner, switching between the jobs of artist and programmer,  or on your own. You will have around two weeks to finish the game and you will be expected to use all the time wisely. Choose a project that will challenge you, but that you can successfully complete. You will have to add to the tutorial that you follow to make individual improvements, and you will have to make all the art yourself. You can use construct 2 or photoshop or flash for art.

think cat.png


Now we are going to start making our own game. Just like you shouldn’t start building a house without having blueprints and a list of supplies, you need to complete a game design document before you start making a game.

Part one: The type of game you are going to make: find a tutorial that is complete (check) and is for a game type that you are interested in making. List the name of the tutorial, the URL, and confirm it is complete.

Part 2: What assets do you need to make the game? Include a list of all the things that need to be made including a background, the players character, enemies, obstacles, music, sounds,…..

Part 3: Make a timetable for what will be done by when. Estimate how long it will take your team to do each part.

Part 4: How can you plan for your partner’s absences?

Part 5: When the game is done, what improvements will you make to the tutorials finished game? Where can you find tutorials to help you add them?

evil-cat


Okay: turn in a word doc with your answers to those parts and get going.

lolcat-evil-plans


Drafting 8: 2 point perspective!

Howdy!

We are going to learn about 2 point perspective, which is just like 1 pt perspective, except now we have 2 vanishing points to help us line stuff up.

The first thing to do is follow this tutorial and draw a house.

Add 2 things to the house when you are done the tutorial. Then you can hand it in as a file called yourname house.

The next thing to do is make a cityblock in 2 point perspective, see here.

Have a bunch of buildings, and make them look different, but all lined up.

Call that  2 pt cityblock yourname.

Drafting 8: One Point Perspective

1_1_resch_line-drawing

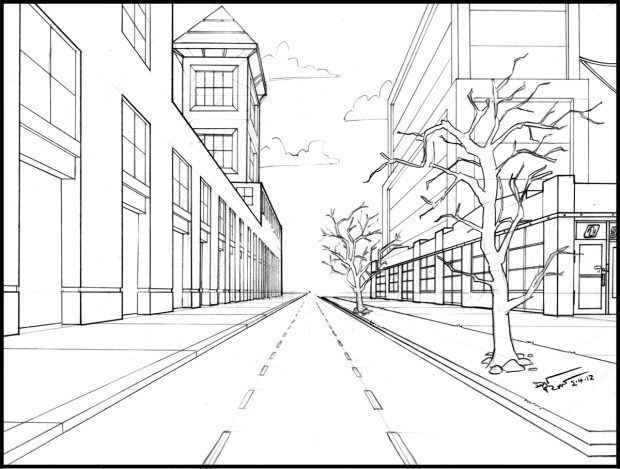
In one point perspective the view is face on with things getting smaller the further away they get.

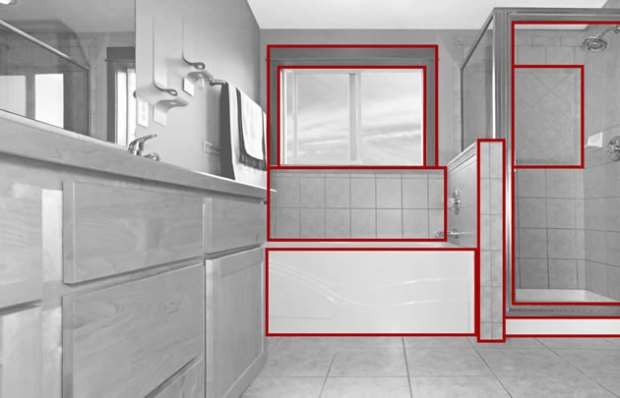
Objects surfaces viewed face on retain their true shape, using mostly horizontal and vertical lines.

1-true

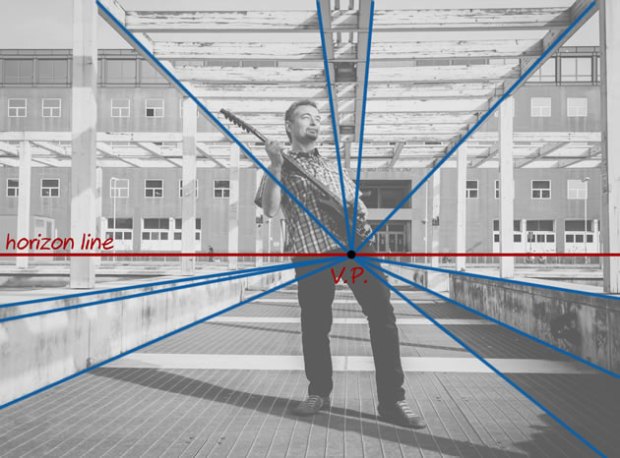
“Surfaces that travel away from the viewer, on the other hand, converge towards a single ‘vanishing point‘. This is a point that is located directly in front of the viewer’s eyes, on a ‘horizon line’ (also known as an ‘eye level line’), as illustrated in the photo below:”1-point-horizon

I got this excellent info, pictures, and description from  this site Click it for more detail.

You are going to use autocad to practice drawing in one point perspective.

Please do the exercises One point perspective cubes and then 1 point perspective: Complex forms. You  only need to hand it in when it looks like complex forms. Write the first letter of your name in the complex forms where the A is.

May 9th Drafting 8 rotation: Tips for making a bike wheel

Hi,

Here are the steps for making a bike wheel.

First use the line tool and draw a line. This is going to be one of the spokes in a wheel.

Screen Capture by Snagit

Then you are going to change the array button to polar array.
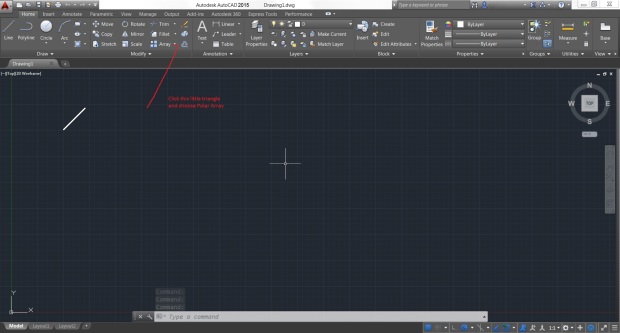
Screen Capture by Snagit

Then you will click the line you drew. Press enter.

Next, click the bottom of the line you drew. Then press enter.

This will open up the polar array window.  At the top left, there will be a window that says Number of rows. The default is 6, change it to at least 36.

Then you will have a star shape. These are the spokes for your wheel.

Next, choose the Circle tool (Circle, radius) and click the center of the star. Use the mouse to make the circle big enough to just touch the outer edges of the spokes.

Lastly, choose the circle tool again and again click the center of the star. Then you will use the mouse to make the circle big enough to go past the outer edges of the spokes. This will be how thick the tire is.

There, now you have a cool wheel. You can use the copy command on it, and then you will have 2 wheels!

Copy works by clicking copy, (looks like one circle becoming 2 circles,) then click the whole wheel, press enter, click on a part of the wheel again, and drag the copy off to where you want it and then click.