Month: February 2021

Computers 9 Day Night cycle

Howdy,

You are going to create a flash animation of a day night cycle. You will need to have a plant or animal or plants and animals react to the amount of light (I.E. a plant turning to follow the sun, or animals that are active during the day (diurnal) do stuff during the day and go to bed when it gets dark, then have the night plants or animals take over.

You also need to use the timeline to change how bright the scene is over the course of the scene. (Hint :convert stuff to a graphic and use color effect brightness).

You will also need: 100 frames with at least 20 frames of step by step action (on the main character so not tweened), at least one plant and one animal, one static ( unmoving) background, two other things that move in the background during the movie (can be tweened), an appropriate sound or two, and 3 really cool things with their own layers.

Total layers: 9 (at least)

Total frames (at least 100)

Here is an example of just the day to night transition, this doesn’t have all  the necessary items, it’s just a demo of the light changes mostly.  the three really cool things, etc.

Day-to-night-basics-graphic-cabin-demo

lolcat-resists-lightsaber

Computers 9 Animate 2 scenes vehicles project

Flash and 2 scene animation

transport-example

You will make an animation with 2 different scenes like this one.Your animations will be more detailed and have more things in them, listed at the bottom of this post.

To make a new scene you click insert and then scene.

insert-scene

To switch between scenes to work on them, click the scene symbol under the timeline (in a classic view workspace).

switching-scenes

You will need: 2 scenes, one passenger, and 2 different kinds of vehicles: one for the passenger in each scene, each scene must be in a different kind of area i.e. scene one land, scene 2 air,at least 60 frames per scene, at least 6 layers per scene, at least 3 moving things per scene, 2 animals per scene.

2 Bonus marks for a zoom.

Computers 9 : Natural Feature

Start a natural feature project: not a waterfall, but a geyser, rock slide, earthquake, volcanic eruption, etc.

It should be at least 5 seconds long, give each layer a good descriptive name.

You should have at least 6 layers,  at least 120 frames, the action of the natural feature should include at least  30 keyframes as a progression, you need an animal and a plant that is affected by the natural feature,  a sound that matches the feature and the area needs to be changed by the feature..

Here is an incomplete example, don’t copy it, make your own! Also this example doesn’t have an animal.

Nature-(Made-from-Weather-starting

rechargeable-lol-cat2

Computers 9: gif, (like the peanut butter)

Hi,

jif

This project has you designing a gif. Your gif is going to be something moving. You will need 5 elements (things that change or move) and a background.

You will need at least 24 frames.

You need to know: how to use filters, how to make a gif, how to use layers (turning them on and off, merging layers), how to make something new out of different parts.

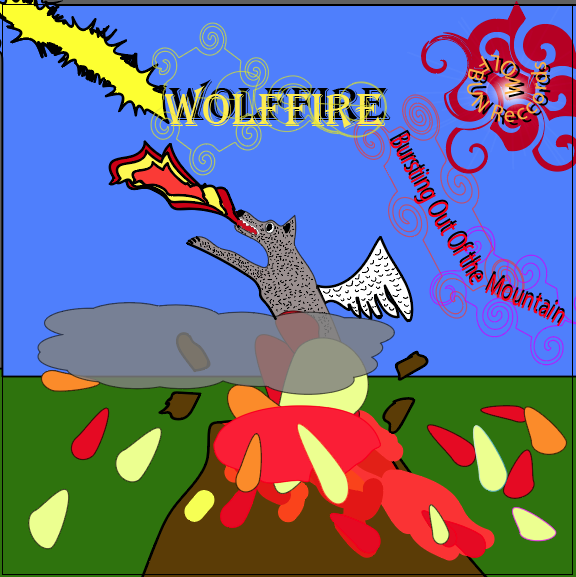
Step 1: Figure out what cool thing the gif will show. You will need things that move or change and a background and text. These are the elements of your gif.

hyperschool-score-not-digital-not-blinking.gif

You need to figure out an interesting idle pattern for it to follow.  The example above Hyperschool has the dino and rider moving in a circle. 1: Facing middle, 2: rearing up in the air (middle facing) 3: rearing up outside facing, 4: facing outward. The pattern is mirrored with another character. The other parts of the idle pattern are spelling out the name of the game in words and individual letters, and the insert coin and high scores for player one and two.

To make that animation I have 28 separate layers and 27 different frames.

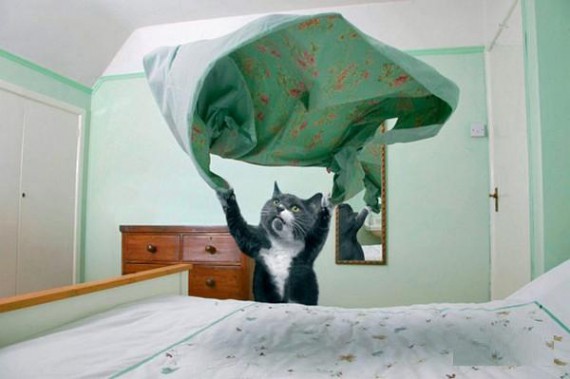
Here’s another gif example, with the theme talking wall.

trump-gif-wall-perfect-I-think.gif

I will show you how to make a simple gif here, and the technique is the same for more complicated gifs, you just follow the steps over and over.

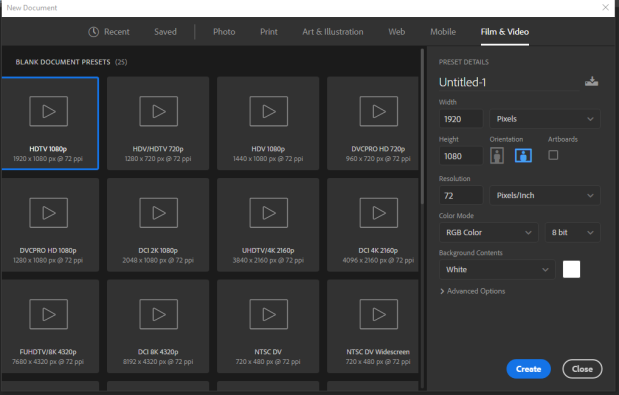
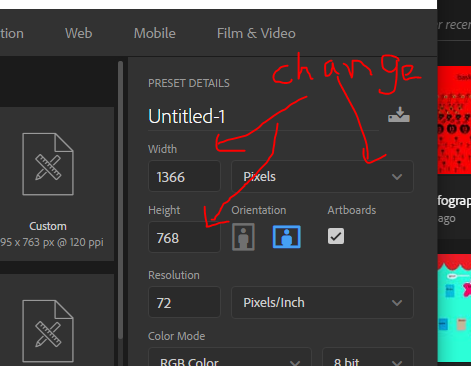
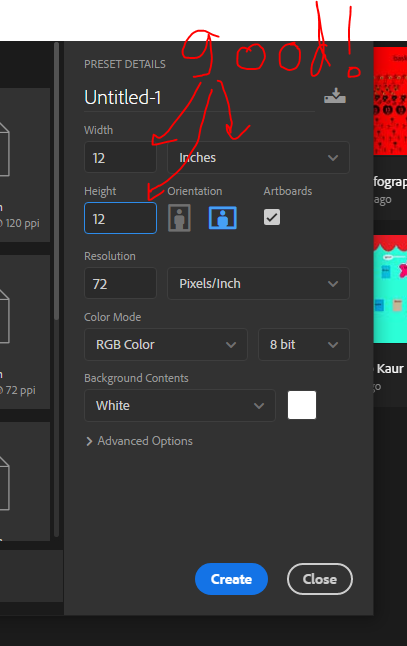
To make a gif: Create a new document in photoshop. Click New> Film & Video> HDTV 1080p.

hdtv

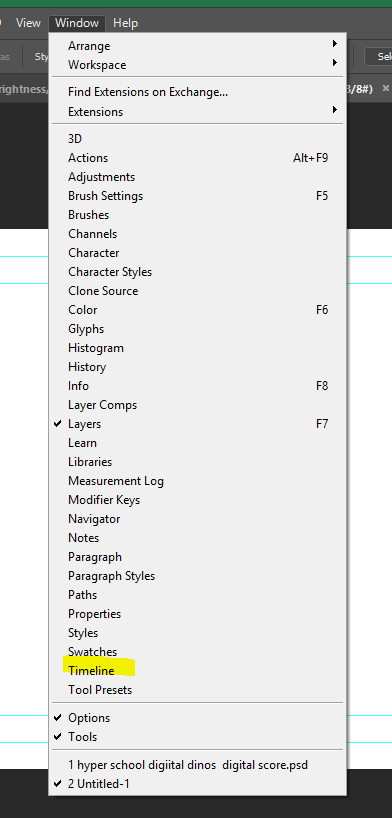
Then you need to turn on the timeline in photoshop. Click Window at the top and move down to  Timeline and click it.

timeline

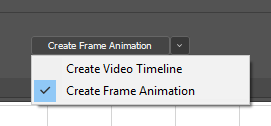
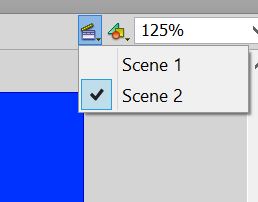
Click the  arrow next to the words Create Video Timeline and change it to Create Frame Animation, then click on Create Frame Animation.

fram

A box will appear at the bottom of photoshop that looks like this: Click the new frame button to make a new frame, play tests it, and click on time to change the time between frames.

explain

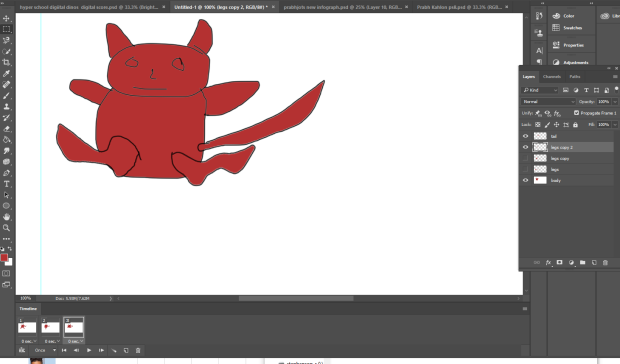
I made a very simple character with 3 different leg position layers to start off with. There is also a head and body layer and a tail layer.

simple chara

Then I use the eyeball button on two of the leg layers to make them invisible.

first.PNG

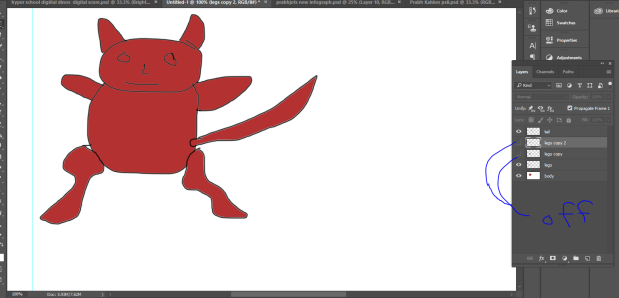
This is the position for the first frame.

Then I click the new frame button on the time line and turn off the legs layer and turn on the legs copy layer.

frame 2

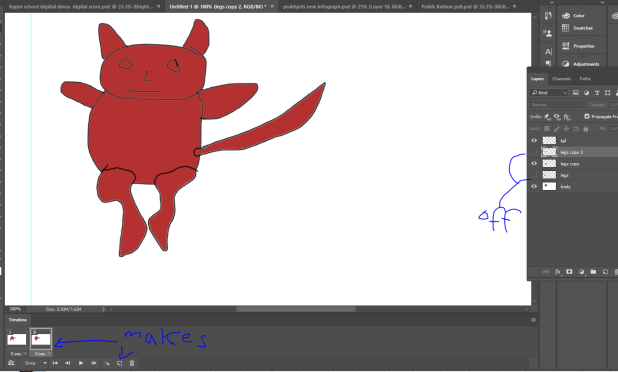
Then I click the new frame button on the time line and turn off the legs copy  layer and turn on the legs copy 2 layer.

frame 3.PNG

By following these steps you can create a gif. You just add a new frame, turn on or off layers (or add new layers) until the animation is finished.

Make sure your gif has:

a multiple step animation (at least 10 frames),at least 7 elements including a background and text, and any other cool things you can think of.

Then you do the steps to finalize the gif, which I will show you here:

1: Find the save for web option. Photoshop moved it somewhere else in creative cloud, but I think that it is under File>Export>Save for web. I might be wrong about where it is hiding though, but it is definitely still under file somewhere. (File>Legacy>save for web ??)Poke around ’till you find it, and then let everyone else know where it is.

OR: just press ctrl + alt + shift + s all at the same time.

2. Choose save for web once it is located.

3. A big box thing will appear. We only want to change one  thing: the loop option from once to forever.

one thing to change

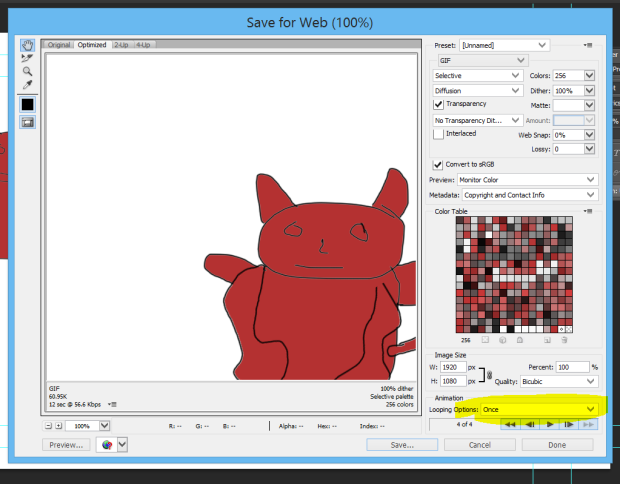
Change it to forever.
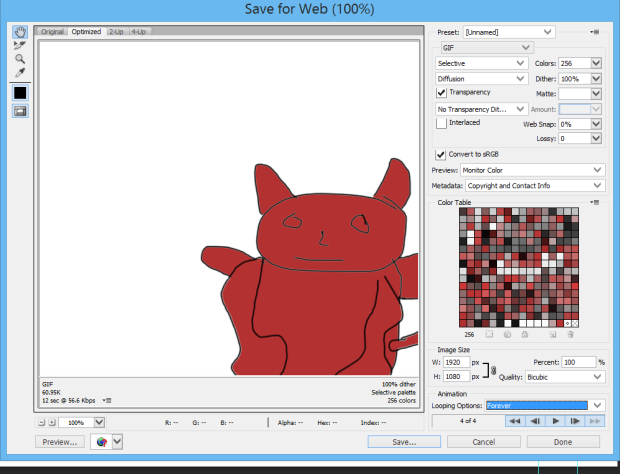
changed!.PNG

Then click Save….

Another window pops up and you type a good file name for the gif, like your name gifaroonie or something like that and then choose save again.

really done

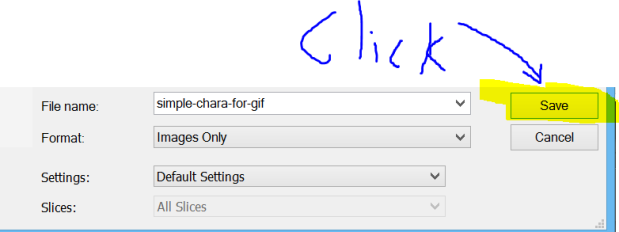
It will export the gif and then when you find and click on it, it should open in an internet browser (probably chrome) and show off your gif.

Hand the gif in, as well as your photoshop psd file.

COM8 EP: Album Cover

You are some kind of musical performing artist. You can choose your genre, and your band name. You are doing ok, and gathered enough money from performing to make a record. The only problem is your manager stole the money that your producer was going to pay for the record cover!! Oh no!!

That means you will have to design and create the record album (this is a thing called Vinyl) all by yourself!

The-Beatles-Beatles-For-Sale-Stereo-Vinyl-LP-Record-Side-1

You can’t use images from the internet, because you have no money to pay for them! You will need to have at least 10 elements on your cover, and it should have your band logo and the album name. Use photoshop to make all the parts (elements) and bring them together in a cool way. Your record album should be 12 inches by 12 inches. An element is a individual piece of art. The album name should represent the art on the cover.

Change albumAlbum ready

House_Cat_Making_The_Bed

“If this cat can make the bed, you can make this!,” said your producer.

Don’t copy this example, but notice a) the group name is Wolffire and there is a Wolf breathing fire,

b) the album title is Bursting out of the Mountain, and that’s what we see. 

album improved

Here are some good examples from real albums. 

ningenmega recordled record

Computers 9 Infographic Hobby

You are going to make an infographic about yourself or one of your hobbies. You will need to give information in text and graphics about it. You will need to have something that you can give us at least 8 different bits of information about. You need to decide your topic and what those 8 things are going to be, then you need to design icons for them. Sometimes, there already will be an icon that fits, you can just draw your own version of it. Other times you will have to make an icon for it.

Infographic :  Steps:

  1. Decide on your topic. Choose something that interests you and has numbers and visuals. You will need a subject that can have at least 8 different sections.

2.Come up with a list of items that you want to show in your infographic.

  1. Make a new document in photoshop  that is either long or wide, depending on how you want your infographic to look. 
  2. Work down your list, linking the layers that are for each item, so if you move them around they go together.
  3. Make an icon for each item on your list.
  4. Type the text for each item.
  5. link the layers of each item and text that relate to the topic together.
  6. When you are done with all the items, move them around on the document until they look cool. Don’t make it look in too much of a grid shape.
  7. Add lines to separate items where needed.
  8. Save the image with a different name, like infographic yourname original.
  9. Save the image with another name like infographic yourname merge.

12.With infographic yourname merge ONLY,  Merge down all the layers to make them one. Don’t do this step with the other file, that way you can change stuff around if you need to later.

  1. Find a background image that is colorful and matches the topic of the infographic.

Source: http://thepicinicbasket.blogspot.ca/2014/05/how-to-make-infographic-using-photoshop.htm

Here is an example with 2 things done. There’s six more to go!

Computers 9 10 Ocelot: Emo Emo Emoji times

Hello,

Today you are going to join the ranks of the people who change the world!

You will make 3 new emojis: one for the Future, one for Now, and one for the Past. Each emoji should have at least 2 variations.

You can’t make an emoji that already exists.

To test if your emoji exists already, do a search on duckduckgo (if you care about your privacy) or google (if you don’t).

You can also check

https://emojipedia.org/

Remember that an emoji is a simple version of the thing it represents. You don’t want to draw something really complicated, but people have to be able to tell what it is right away.

Keep your drawing as simple as possible, but make sure that no one will mistake it for anything else.

COM8 EP Finishing loops, starting conditionals

Hello,

Let’s continue our journey of coding: for each step, take a screenshot of the final level once you are done, that shows you have done all of the other levels. Name the screen shot your name and the level so if Mr. S was handing in a screenshot for step 8 it would be Mr. S Step 8.png

Step 7 HERE

Step 8 here

Step 9 Here

Step 11 Here

Write 5 good questions by yourself or with a partner when you are done handing in the screenshots. Hand in your questions, with the names of everyone in your group.

Computers 9 : Column/bar Graphs

Hey, the next project is to do the same thing we did with the pie charts, but use bar graphs instead. You will make 4 Column or bar graphs, with each graph having 5 answers.

You can just make the numbers up again!

Cool huh?

So just use excel to make the column graphs (bar graphs are ok too), and then use photoshop to fill the graphs with the picture of the thing that the graph represents.

Here is an example:

column example