Month: March 2017

Drafting 8: Orthographic projection

Finish up your birds eye and worms eye cities, then start orthographic projection.

Read the pdf below called projections and views,

projections and views

then draw the shape below in autocad, call it Toolbox.

u2s3l2f-26

Next complete these exercises by saving the files and opening them in paint. Write the correct letter for each view.

Choose 2 shapes from exercise 4 (above) and draw their othographic views in autocad. Label the views and the shapes you choose to draw.

3 point Perspective Birds and Worms eye View

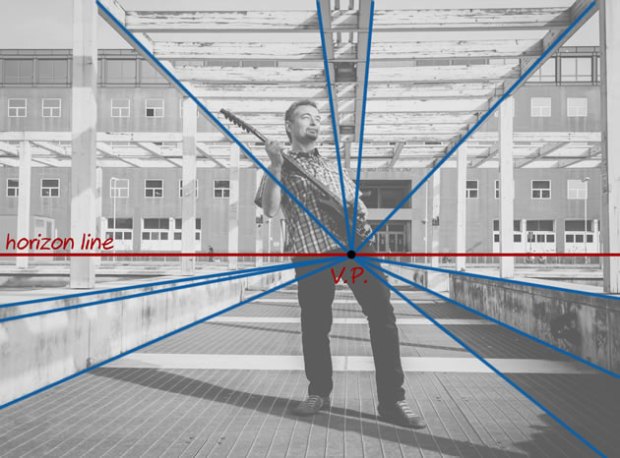
Hey now we will do our last two perspective drawings, from above and below. To get a perspective from above or bird’s eye view we need to add a third point that is below the horizon line, in the middle of the two vanishing points that are on the horizon line.

Like this: maxresdefault

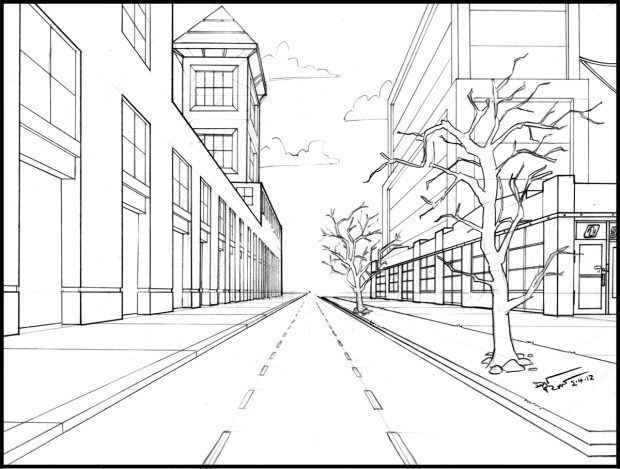
As you can see in the drawing, it looks sort of like our city view in 2 pt perspective but there is a difference. All of the vertical lines (going up and down) in the drawing start from the third point in the middle of the drawing. The horizontal (going left or right) lines on the right or left all connect to the vanishing points on the right or left.

This tutorial will show you how to start drawing  a bird’s eye view


Check the tutorial here:

Just make the building taller, like a skyscraper, not short, like a house in the tutorial.

You can also keep the roof flat if you want.  Then just run more lines up from the center vanishing point to add more buildings. Make sure you have at least 2 windows, 4 buildings, a sidewalk, and 5 other things in your drawing.

OLYMPUS DIGITAL CAMERA

You will have to also have to draw a worms eye view. Here are some pictures taken from another tutorial that shows the steps to do it really well but they color the buildings in, and you don’t have to do that. Take a look at the pictures and see how to do it, step by step.

Make sure you have at least 2 windows, 4 buildings, a sidewalk, and 5 other things in this  drawing.

I will put a link to the site at the end of the pictures, but they are using a different program to draw the perspective, so the tutorial talks about some stuff that we don’t have in autocad.

this is where all the steps come from.
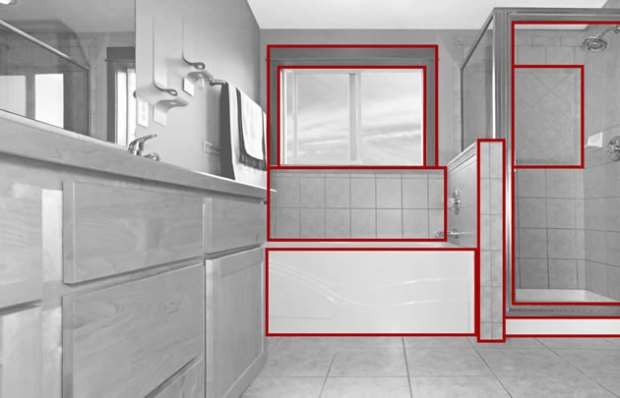
More Examples


Computers 19 : Natural Feature

Start a natural feature project: not a waterfall, but a gyser, rock slide, earthquake, volcanic eruption,

etc.

It should be at least 5 seconds long,

You should have at least 6 layers,  at least 60 frames, the action of the natural feature should include at least  30 keyframes as a progression, you need an animal and a plant that is affected by the natural feature,  a sound that matches the feature and the area needs to be changed by the feature..

rechargeable-lol-cat2

Computers 19 Tiger button hold the tiger!

Hey Computer Wizards!

Using the skills learned to make a button, a movie clip, and add sounds to flash you will make a button like my tiger button but without using a tiger.


It needs: a button

2 sounds that fit one for over, one for down

and a movie clip that has: 6 layers

at least 40 frames

4 moving parts on 1 thing, i.e. eyes, mouth, tongue, ears on a face

a progression- regression sequence (things opening and closing in steps)


Be careful not to forget anything!

LOLCat2 floaties


Drafting 8: Two point perspective!

Howdy!

We are going to learn about 2 point perspective, which is just like 1 pt perspective, except now we have 2 vanishing points to help us line stuff up.

The first thing to do is follow this tutorial and draw a house.

Add 2 things to the house when you are done the tutorial. Then you can hand it in as a file called yourname house.

The next thing to do is make a cityblock in 2 point perspective, see here.

Have a bunch of buildings, and make them look different, but all lined up.

Call that  2 pt cityblock yourname.

Computers 19

Flash and 2 scene animation

transport-example

You will make an animation with 2 different scenes like this one.Your animations will be more detailed and have more things in them, listed at the bottom of this post.

To make a new scene you click insert and then scene.

insert-scene

To switch between scenes to work on them, click the scene symbol under the timeline (in a classic view workspace).

switching-scenes

You will need: 2 scenes, one passenger, and 2 different kinds of vehicles one for the passenger in each scene, each scene must be in a different kind of area i.e. scene one land, scene 2 air,at least 60 frames per scene, at least 6 layers per scene, at least 3 moving things per scene, 2 animals per scene.

2 Bonus marks for a zoom.

Drafting 8: One point perspective

1_1_resch_line-drawing

In one point perspective the view is face on with things getting smaller the further away they get.

Objects surfaces viewed face on retain their true shape, using mostly horizontal and vertical lines.

1-true

“Surfaces that travel away from the viewer, on the other hand, converge towards a single ‘vanishing point‘. This is a point that is located directly in front of the viewer’s eyes, on a ‘horizon line’ (also known as an ‘eye level line’), as illustrated in the photo below:”1-point-horizon

I got this excellent info, pictures, and description from  this site Click it for more detail.

Please do exercises 1 and 2 from that site, if you finish early please do exercise 3 from the site.